If you’re looking to make an impression with festive Halloween treats, Halloween cake pops are an ideal choice. Not only are they easy to customize, but they’re also fun to make and perfect for any Halloween gathering. In this guide, you’ll find everything from essential ingredients and tools to creative decorating ideas, plus tips for storage and display. Follow these steps, and you’ll be ready to serve up spooky, delightful treats in no time.
Ingredients and Tools for Halloween Cake Pops

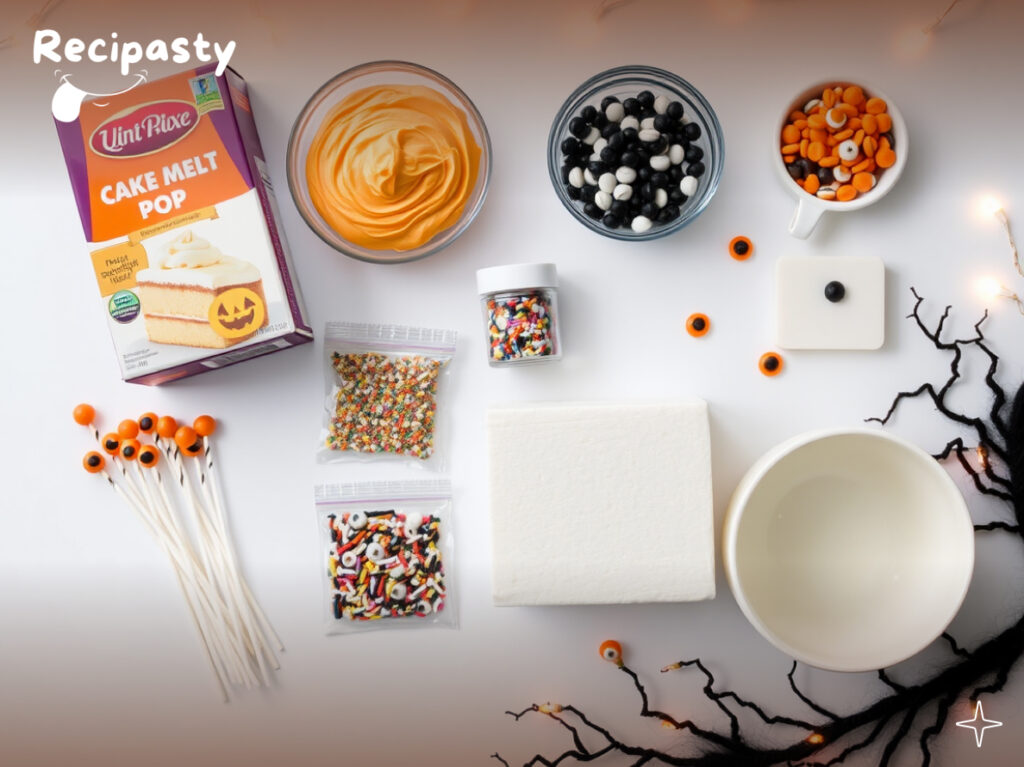
To get started, gather the following ingredients and tools for smooth, successful cake pop-making. The basics you’ll need include:
- Cake mix (or a pre-baked cake in any flavor)
- Frosting to bind the cake mix into balls
- Candy melts or chocolate coating for the outer layer (orange, black, or white are perfect for Halloween themes)
- Cake pop sticks to hold the treats
- A Styrofoam block to let cake pops dry upright
Additional tools can make the process easier:
- A deep bowl for dipping the pops
- Parchment paper for setting dipped pops
- Decorations like sprinkles, candy eyeballs, crushed Oreos, and mini chocolate chips
To make coating easier, try adding a bit of vegetable oil to the candy melts. This smooths the coating and prevents it from becoming too thick.
Step 1: Preparing the Cake Pop Base

The base of a cake pop is made from cake crumbs combined with frosting. Here’s how to get the texture just right:
- Crumble the Cake: Start by breaking down the baked cake into fine crumbs in a large bowl. You can break up the cake by hand or with a food processor, depending on your preference.
- Mix in Frosting: Gradually add frosting, starting with small amounts. The mixture should hold together when squeezed, but shouldn’t be too sticky.
- Roll into Balls: Once the frosting is fully mixed in, roll the cake mixture into small, even balls, about 1 inch in diameter.
- Chill the Cake Balls: Place them on a tray and refrigerate for at least 30 minutes. Chilling helps the pops hold together when they’re dipped and decorated.
For a step-by-step guide on achieving the perfect base texture, check out cake pop coating tips.
Step 2: Coating the Cake Pops
Once the cake balls are chilled and ready, it’s time to start coating. This step is crucial for creating a smooth, professional finish.
- Melt the Candy Coating: In a microwave-safe bowl, heat candy melts or chocolate in 15-second intervals, stirring frequently to prevent burning. Adding a small amount of vegetable oil can help create a smooth coating consistency.
- Dip Each Pop: Take each cake ball, dip one end of the stick into the melted candy, and insert it halfway into the ball. This step helps secure the ball to the stick.
- Fully Coat Each Ball: Dip each ball into the melted candy, rotating to ensure even coverage. Lightly tap the stick against the bowl to remove extra coating and avoid drips.
For additional tips on getting that smooth coating and avoiding cracks, refer to this helpful Halloween dessert inspiration page.
Step 3: Decorating Halloween Cake Pops

Now comes the fun part—decorating! Halloween cake pops offer endless opportunities for creative expression. Here are a few popular options:
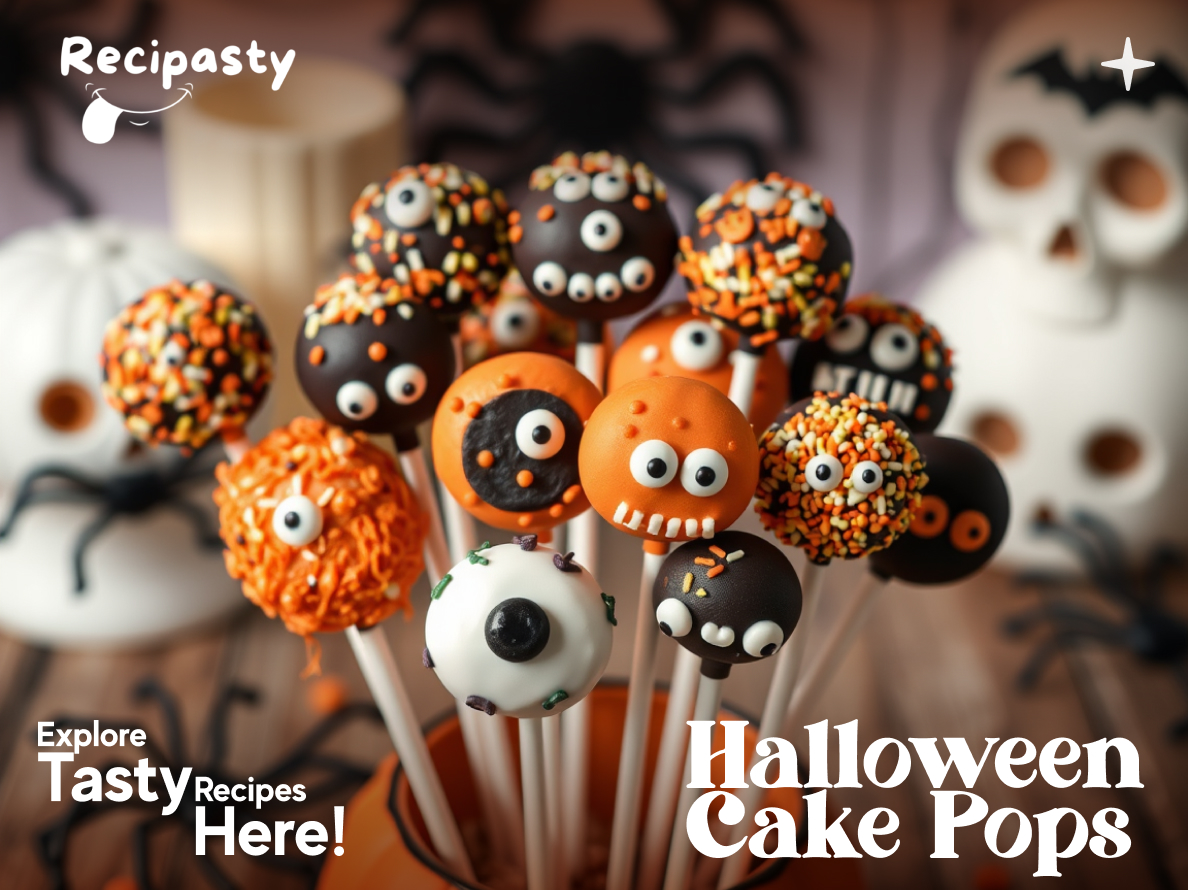
- Classic Halloween Colors: Use orange, black, and white candy melts as your base colors. Top with Halloween-themed sprinkles.
- Monster Eyes: Apply candy eyeballs directly onto the coating to create “monster” faces. For an extra eerie look, add additional sprinkles or candy to create “hair.”
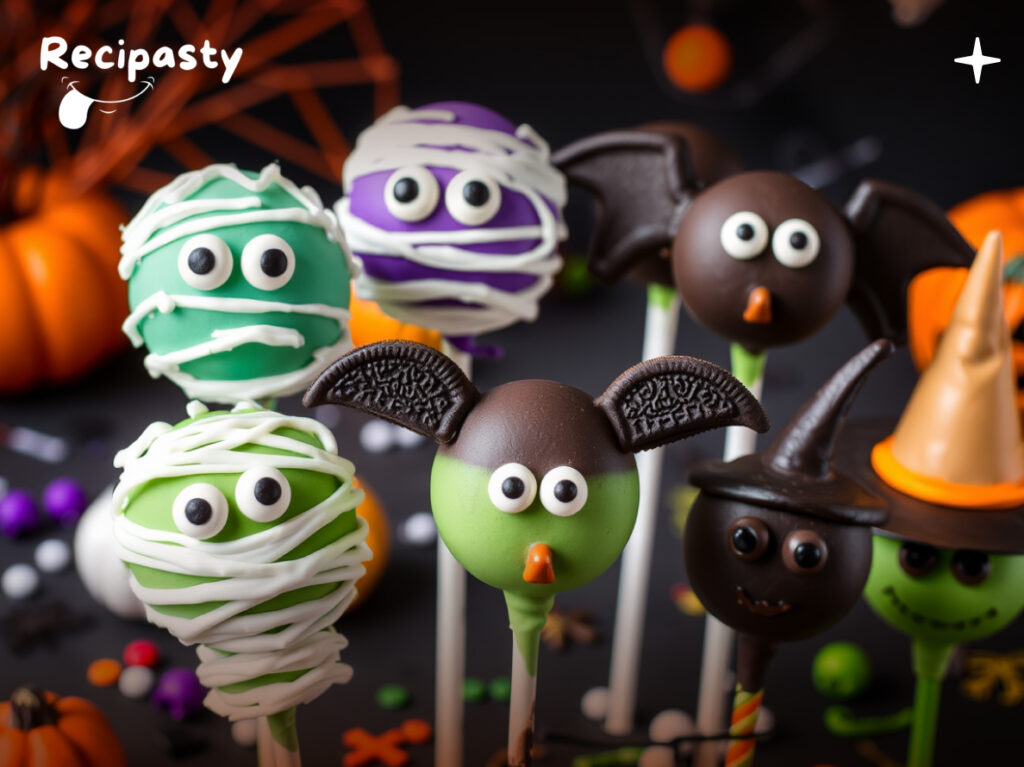
- Witches and Mummies: Create witch cake pops by adding mini cones as hats or using black icing to draw witch faces. For mummy pops, drizzle white chocolate over a darker base and add candy eyes for a “wrapped” effect.
Advanced Halloween Designs
If you want to take your Halloween cake pops to the next level, try these more advanced designs:
- Monster Pops: Use vibrant colors and candy eyeballs to create a spooky, monster-like appearance. Add sprinkles for “hair” and colorful food coloring for unique looks.
- Bat Pops: Attach Oreo halves as wings to each cake pop and use black food coloring for the bat body. Draw small faces or features with icing for added detail.
- Witch Hats: Make witch hats by placing mini cones on top of the pops, then spray with black food coloring. You can use melted chocolate or candy melts to secure the hats to the cake pops.
Tips for Perfect Cake Pops
Cake pops are simple to make, but they can be finicky. Here are a few tips to ensure your Halloween cake pops turn out perfectly:
- Keep Cake Balls Chilled: This helps them stay firm during coating. However, avoid freezing them solid, as the coating may crack.
- Avoid Overheating the Coating: Candy melts or chocolate can easily burn, so heat in short intervals and stir frequently.
- Tap Off Excess Coating: After dipping each pop, gently tap the stick on the bowl to remove any extra coating. This helps create a thin, even layer and prevents drips.
For even more troubleshooting tips, check out the cake pop coating guide.
Storing and Making Cake Pops Ahead of Time
If you’re preparing for a big event, making cake pops ahead of time can be a lifesaver. Here are a few ways to keep them fresh:
- Short-Term Storage: Place in an airtight container in the fridge for up to one week. Be sure to keep them at a consistent temperature to prevent condensation.
- Freezing for Longer Storage: Freeze the pops in a single layer, then move them to an airtight container. When ready to use, thaw in the refrigerator to avoid condensation on the coating.
Displaying Halloween Cake Pops
Presentation adds a special touch, especially for Halloween treats. Here are a few ideas to make your cake pops stand out:
- Use a Styrofoam block to hold the pops upright.
- Arrange cake pops in a festive container, like a pumpkin or Halloween-themed basket.
- Add small decorations, like mini pumpkins, plastic spiders, or candy corn, around the base for a spooky vibe.
FAQs on Halloween Cake Pops
- How can I keep my cake pops from falling off the sticks?
Dip the stick in a bit of melted chocolate before inserting it into the cake ball. This helps secure the stick to the pop, especially after chilling. - What coatings work best for cake pops?
Candy melts and chocolate chips are popular choices. They harden quickly, are easy to work with, and can be found in various colors. - Can I make Halloween cake pops without sticks?
Yes, you can skip the sticks and make “cake balls” instead. Simply coat and decorate each ball as usual, then place on parchment paper to set. - How should I store decorated cake pops?
To maintain freshness, store the cake pops in a tightly sealed container in the refrigerator. This keeps them fresh and preserves the decoration.
Conclusion
Halloween cake pops are a festive, easy way to celebrate the spooky season. With a few simple ingredients, some creativity, and these step-by-step tips, you’ll have treats that are sure to impress. Happy Halloween, and enjoy creating these sweet, spooky delights!

